Tuesday, October 27, 2009

Final Harvest

Well, then.

Our grand growing experiment has come to an end for this year and it's time to put the veggie bed to bed.

We've plucked off the last of the tomatoes, pulled up the final carrots and harvested the potatoes at last (more on that in a sec). Our busy little bed has gone from this:

To this:
(That's my niece, Sydney, picking tomatoes.)

And now, to this:

Failures:
  • Strawberries (killed two sets of plants)
  • Mail order tomatoes (4 died)
  • Touchon carrots (they grew but we didn't like them)
  • Sweet potatoes
Very disappointed in our Beauregard sweet potatoes. We were hoping for big, scrumptious suckers like these:
But instead, after months of waiting and drooling, we got these:


Seriously.

You're supposed to 'cure' sweet potatoes in a warm, humid place for two weeks or so, to give their skin time to heal ('cause it looks so delicate, don'tcha know), and for the starches to convert to sugars and get all sweet.

Um.

They're curing, but...they're rather frightening to behold. I'm thinking we carve 'em up and stick 'em out on Halloween night.

Successes:
  • Tomatoes (I'm going with Family Tree Nursery transplants again next year. Sun Sugars are awesome.)
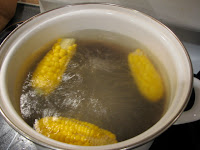
  • Corn (limited harvest but amazing flavor)
  • Lettuce (I didn't do a great job of keeping the harvest going, but it was good while it lasted)
  • Purple Dragon carrots (good taste, beautiful color)
  • Fingerling potatoes (moderate success. Didn't produce very many, but they were good.)
  • French green beans
Without a doubt, the green beans were an outstanding success. The girls are begging for more. We've tried the frozen haricort verts, but - meh. Not the same as picked fresh from the garden. And I just can't bring myself to buy the canned stuff anymore.

Next year we'll try some new yummies. I may be able to talk the fam into trying peas. I'm fascinated by Thomas Jefferson's annual pea growing contest with his neighbors. They supposedly had around 32 different varieties to taste!

I'll be back in the spring to chronicle our growing adventures next year.

I'll leave you with a recipe that impressed my kids and my non-veggie lovin' hubbie. These will work on good old store bought carrots, but we did it with the last of our home-grown beauties.

Enjoy!
Honey-Vanilla Glazed Carrots

8 ounces baby carrots (or sliced grown-up carrots)
1 1/2 tablespoons honey
1/4 teaspoon vanilla extract
1 tablespoon butter
1/4 teaspoon white wine vinegar
pinch of salt

Put it all in a saute pan over medium-high heat, carrots in a single layer.
Let simmer until the pan is almost dry.

Try not to smack your lips too loudly while eating.

Saturday, August 29, 2009

Summer's Bounty


Oh yeah.

We're talkin' Razzle Dazzle tomatoes, Purple Dragon carrots, Sun Sugar tomatoes and Swedish Fingerling potatoes.

It's not a big harvest, mind you. A mere plateful, actually.
But it's a big deal around here.

I dug up a couple of potatoes just to see how big they were. I wouldn't call them 'fingerlings' so much as 'stumplings.' See?
Just about the size of a cherry tomato. So, they stay in their barrels a bit longer.

The big news is that we were able to harvest and eat some of the Maple Sugar corn.

We had 6 ears that bloomed...sprouted...grew...whatever they do...but 2 of them mysteriously turned moldy. So I was only able to pick 4 ears.

We carefully husked them to see their beautiful golden goodness inside...
Holy Weirdness, Batman! What kind of freakish vegetable creature have I grown??

Not sure what happened to that poor little guy. Needless to say, we didn't eat it.

So we were down to 3 ears. For 4 people. Rather than do brain-hurting math, I cooked the 3 remaining ears...
(yes, they're supposed to be that small)

...and cut all the kernels off so we could divvy up the goodness equally.

And, man, was it good. True to the name, there was a maple sugary taste to the corn. Quite unlike any corn I've ever had. Very, very good. We decided that if we do corn again next year, we plant a LOT more of it.

There are a few cornstalks that haven't produced anything yet, but they are getting little silky mop tops, just like the earlier ones did. We'll see if anything comes of it. Our taste buds sure hope so.

I'm still waiting for my White Wonder tomatoes to turn white. (I have mistakenly been calling them Italian Ice tomatoes. Italian Ice was the plant I ordered. Then killed. White Wonder is the replacement.)

The plant has a lot of green, lemon shaped tomatoes on it:
And one very yellow tomato:
Not quite sure what to make of that. I'll keep you posted.

In honor of all this yellow, summery deliciousness, I'll give you a fantastic lemonade recipe. Normally, I'm not a big fan of Rachel Ray's recipes, but this time she nailed it. This lemonade is so good, my girls don't want to even look at the canned, powdered or concentrate kind anymore.

It's a bit of work, but it's worth it. (So if I ever serve it to you, you know it's 'cause you're special.)
Honey-Vanilla Lemonade

2 cups sugar
1/2 cup honey
2 cups water, plus more as needed
1 vanilla bean
2 1/2 cups freshly squeezed lemon juice (from about 12 or so large lemons)
Lemon wheels or wedges for garnish

In a large saucepan, combine the sugar, honey and 2 cups water, and place over medium-high heat. Cut the vanilla bean in 1/2 lengthwise, then, using the back of the knife, scrape the vanilla seeds from the pod and add to the saucepan, along with the pod. Bring the mixture to a boil and cook for 4 or 5 minutes, until the sugar is dissolved and the mixture thickens. Remove from heat and allow to cool.

Put the lemon juice into a gallon jug or pitcher. Pour the sugar syrup through a strainer into the pitcher and discard the pod. Add water to equal 1 gallon and stir well.

Serve over ice with lemon wheels or wedges.

Tuesday, July 21, 2009

How Does My Garden Grow...?

Meet Poppy. This is the baby bunny we rescued from a neighbor's window well. And the reason we built the veggie bed 20 inches high. He lives in the wood pile next to the veggie bed and stares at it, cursing his short little legs. Muwahahahaha!!!

But I digress.

I knew I'd slacked off the blog a bit - but 2 months?! Holy compost, Batman! And to think I've kept you all waiting so long, just hoping to find out the latest tomato turmoil and corn
crisis...

What? Not really? You haven't been angsting over the arugala?

Neither have I. As the summer has been flying by, the veggies have been flying upwards with very little effort from me.

One day the bed looked like this:


And, 60 or 70 days later, it looks like this:


Oh and this:


Those are the Swedish Fingerling potatoes on the left and the sweet potatoes on the right.
Apparently, potatoes wreak havoc on the soil and surrounding plants, so we're growing them in highly chic black trash barrels.

We've been able to start enjoying the veggies of our labor, which is a treat. We've had lettuce, which I can't seem to find a picture of, and these lovelies:

The tomato plants I ordered all died, so I went to
Family Tree Nursery and picked up some replacements. All cherry tomatoes, but different types with things like "Honey" and "Candy" in their names. (Oh, and some Italian whites that haven't fruited yet.) The few we've had have been very yummy.

The green beans - oh the green beans! French Filets
- and man are they good! (These can cost you a pretty penny in one of them high falutin' restaurants.) Harper hates green beans and says these "aren't bad." And Rick - not a bean lover at all - actually likes them.

We did a side-by-side taste test of our babies and the standard canned variety. Both lightly tossed in a little butter. The Filets were vibrant green color and tasted so fresh and "green, but in a good way," as Rick put it. No contest! After a slow start, these little bean bushes are putting out a goodly amount of beans each day. I have people looking forward to eating green beans, folks!

The corn isn't as high as an elephant's eye - yet - but it's getting up there. Here are some beauty shots of these Maple Sugar delights:


(Harper pointed out the pretty water beads on the corn silk this morning.)

The carrots look nice and bushy, hopefully we'll be able to eat them soon. We tried one of the Touchon carrots today:
They should be ready to harvest any day now, but this little guy was far short of the 6 inches in length it's supposed to be. The girls thought the flavor was ok. I took a bite - and felt like Tom Hanks' character tasting caviar in "Big." Bitter bitter bitter!! I tried to set a decent example for the girls by not spitting them out into the yard - a difficult feat. Harper ran and got me a chocolate mint leaf to get rid of the bad taste. Oh man, I hope these things get better!

Other than that, our grand experiment is going grandly. I've planted a 3rd round of lettuce and a second round of carrots, so we can keep enjoying veggies into the early fall.

Here's a tasty way to enjoy fresh green beans - don't try this with filets, they'll turn into little bits of charcoal. But you can grab a pound of fresh beans from the grocery store or farmer's market and try this. Very tasty.

Roasted Green Beans
An aluminum foil liner prevents burning on dark nonstick baking sheets and makes for easy clean up.
Serves 4

1 pound green beans, stem ends snapped off
1 tablespoon olive oil
table salt and ground black pepper.

1. Adjust oven rack to middle position; heat oven to 450 degrees. Spread beans on lined baking sheet. Drizzle with oil; using hands, toss evenly. Sprinkle with 1/2 teaspoon salt, toss to coat, and distribute in even layer. Roast 10 minutes.
2. Remove baking sheet from oven. Using tongs, redistribute beans. Continue roasting until beans are dark golden brown in spots and have started to shrivel, about 10 - 12 minutes longer.
3. Adjust seasoning with salt and pepper; transfer to serving bowl and stuff your face.

Sunday, May 17, 2009

Here Comes the Sun!

After many, many rain delays, (and snow!) we finally got to plant our seeds last weekend.
Here's the official list of what we planted:
Carrots: Purple Dragon and Touchon
Corn: Maple Sugar
Lettuce: Heatwave Blend (several types of lettuce that can stand up to our summer heat)
Green Beans: French Filet
Potatoes: Swedish Fingerling; Beauregard sweet potatoes
Strawberries: Eversweet

Now. About the strawberries. The poor dears had to languish in a pot under a grow light in our basement for several weeks. There was a lot of rain. And sometimes it just was too stinkin' cold to put them out.

I finally dragged them outside and started to plant them in their little strawberry tower. It has a removable bottom. Which, if you're not very careful, will come off when you try to turn it over after filling it with soil. Of course, I was very careful...but it all dumped out anyway.
It was all his fault:
After refilling the tower, I started to plug the strawberry plants into the tower. It looked like someone shoving a big ol' tobacco chaw into a little bitty mouth.
They all got planted and our cheery little tower finally looked like this:

That was a week ago. After one week, lots of threatening looking clouds, some brief but heavy downpours, it looks like this:
Yikes.
Not sure if these babies are gonna make it. Did I mention there were mushrooms in the pot from the basement? Mighta had something to do with it.

Good news on the seeds, though. 
We now have lettuce sprouts!

And little slivers of corn stalks, tiny carrot tops that look like fairy wings, and today, a bean sprout.
This is a long post, so I'll wrap it up. But I did get the potatoes planted in their containers yesterday. Photos and how-to on that next time.

Today's recipe is a sunny Baked Lemon Pasta from the Pioneer Woman herself. Made it tonight and it is delish!

Baked Lemon Pasta
1 pound thin spaghetti
1/2 stick (4 tablespoons) butter
2 tablespoons olive oil
2 cloves garlic, minced
Juice of 1 lemon
Zest of 1 lemon
2 cups sour cream
1/2 teaspoon kosher salt, more to taste
Plenty of grated Parmesan cheese
Flat leaf parsley, chopped
Extra lemon juice

Preheat oven to 375 degrees. Cook spaghetti until al dente.
In a skillet, melt butter with olive oil over low heat.
When butter is melted, add minced garlic.
Squeeze lemon juice into pan. Turn off heat.
Add sour cream and stir mixture together. Add lemon zest and salt. Taste, then add more salt if necessary.
Pour  mixture over drained spaghetti and stir together, then pour spaghetti into an oven safe dish.
Bake, covered, for 15 minutes. Then remove foil and bake for additional 7 - 10 minutes. (Don't bake too long or pasta will dry out.)
When you remove it from the oven, squeeze a little more lemon juice over the top. 
Top generously with Parmesan cheese, then chopped parsley.
Give it a final squeeze of lemon juice at the end.

Monday, March 30, 2009

Dirt-o-rama

It seems I've always had a thing about dirt.


This is me, age two. I have just been caught eating dirt.

Even at this tender age, I subscribed to Margaret Atwood's philosophy:
"In the spring, at the end of the day, you should smell like dirt."

So when it came time to fill our veggie bed with soil, I wanted to do it right. After much thought, comparison shopping and an ungodly amount of math
we decided to have our garden soil delivered in bulk, rather than haul dozens of bags of soil from the hardware store. A few days ago, the good folks at Missouri Organic showed up with an alarmingly large dump truck full of luscious garden-ready goodness. 


(No, the kid wasn't the prize that came with the dirt.)

And that evening it started to rain. I hauled wheelbarrow after wheelbarrow full to the back yard in a vain effort to get it all put into the bed before dark.
The next day, Friday, it rained some more - and the forecast was for 8" of snow by Saturday morning. I hauled more wheelbarrows to the back all the while wondering if I could get it all done before the snow and before I went all Jane Austen and came down with consumption from being out in the freezing rain. 25 wheelbarrow loads later, did I finish before the snow???

Nope.

The snow has melted, but the ground will be too soggy to drag a heavy wheelbarrow across for a few more days yet. That's ok. As March shrugs off the last of winter's chill, I'll sip on my final batch of hot Russian Tea for the season and daydream about little green shoots stretching out into the warm sun of spring.

Russian Tea
Makes: A big pot
This recipe has been in our family for quite a long time. You may find recipes called Russian Tea here and there - but if there is any instant tea or Tang involved, call it for the fraud that it is and fling it far from your person. 

1 gallon water
6 black tea bags, decaf is acceptable
2 cinnamon sticks
1 heaping teaspoon cloves, in a tea ball
1 64 oz can pineapple juice
3 cups orange juice (pulp free is best)
1 lemon, cut in half
1 cup of sugar

Put water, tea bags, cinnamon sticks and cloves into a large pot. Bring to a boil over medium high heat. Reduce heat to medium low and let steep for 20 minutes or so.

Add juices. Squeeze lemon juice into mix, then toss lemons in. Add sugar and stir. Reduce heat to low and let the flavors meld. Time on this is subjective. I find that at least an hour is required to really build up a good flavor balance. Take all the floating ingredients out when the flavor makes your eyes roll back and an involuntary "Mmmm" purrs out of your throat.

I like an equal balance of clove and cinnamon - you may like more of one than the other. The cloves have the strongest flavor, and I find that if left in too long, the tea gets a bit bitter. Play with the balance and timing until you are ridiculously satisfied.

Tuesday, March 17, 2009

One Step Closer

Over the weekend we started sod busting to make room for the vegetable bed. Harper rescued worms from the sod
and helped her dad sort lumber. 

Ricki said we needed to figure out how much usable cedar we had left over from the tree house and how much we needed to buy to build the raised bed. When he started muttering numbers, I pretended I had sod in my ears and wandered off, wisely leaving the calculations to him.

He's keeping the girls busy tricking out the tree house over spring break - but those sneaky petes were up to something else today. I came home from work and found that the 3 of them had done this:


Do I have a cool family, or what? All we need is a burrow-proof screen for the bottom and a lot of dirt and we'll be ready to get going.

I did a walk-about of the whole yard and found the first signs of my other culinary treasures peeking up into the late afternoon sun.

Chives

Lemon Thyme

In honor of St. Patrick's day and our garden-to-be (which will include potatoes), here's a recipe for Skillet Roasted Potatoes with Lemon and Chives. 

(I believe this is from Cook's Illustrated, May 2005)

For even cooking and proper browning, the potatoes must be cooked in a single layer and should not be crowded in the pan, so be sure to use a heavy-duty 12-inch skillet. 
Serves 3 - 4

2 teaspoons grated lemon zest
2 Tablespoons minced fresh chives
1 1/2 pounds Red Bliss potatoes, small or medium, scrubbed and unpeeled
2 Tablespoons olive oil
3/4 teaspoon kosher salt
1/4 teaspoon ground black pepper

1. Combine lemon zest and chives in small bowl.
2. If using small potatoes (1 1/2- to 2-inch diameter), halve each potato. If using medium 92- to 3-inch diameter), quarter each potato to create 3/4 to 1-inch chunks. Rinse potatoes in cold water and drain well; spread on clean kitchen towel and thoroughly pat dry.
3. Heat oil in heavy-bottomed 12-inch nonstick skillet over medium-high heat until shimmering. Add potatoes cut side down in single layer; cook, without stirring, until golden brown (oil should sizzle but not smoke), 5 - 7 minutes. Using tongs, turn potatoes skin side down if using halved potatoes, or second cut side down if using medium; cook, without stirring, until deep golden brown, 5 - 6 minutes longer. Stir potatoes, then redistribute in single layer. Reduce heat to medium-low, cover, and cook until potatoes are tender (paring knife can be inserted into potatoes with no resistance), 6 - 9 minutes.
4. When potatoes are tender, sprinkle with salt, pepper and lemon chive mixture, and toss or stir gently to combine. Serve immediately.

Tuesday, March 3, 2009

Snow and Strawberries

On March 1 I read that some cool weather crops, such as potatoes, should be in the ground by mid-to late March. 

Since we were laid up with flu and the garden-to-be looked like this:


 I doubted that this garden wisdom would be heeded.

Instead, in between nose blows and pathetic rounds of "Who Feels Worse?" I thumb through catalogs and drool over strawberries like these Ozark Beauties.

"Wave after wave of lush berries all the way through frost." Ahh...

Although, upon close inspection, the dimples in these berries 
make them look like little red butts.


Here's an easy recipe for some Strawberry Jam. Even with store bought, out of season berries you can get a yummy jam that's fantastic on toast, biscuits, scones or just the end of your fingers.

Strawberry Refrigerator Jam
from "The America's Test Kitchen Family Cookbook" pg 780.

Makes about 2 cups

1 quart strawberries, hulled & sliced thin
3/4 cup sugar
2 tablespoons fresh lemon juice

Set a small bowl over a larger bowl of ice water and set aside. Simmer strawberries, sugar and lemon juice in a 12-inch nonstick skillet over medium heat until the mixture begins to look syrupy, about 10 minutes.

Remove skillet from heat and spoon 1/2 teaspoon fruit mixture into the small bowl set over ice water. Let sit for 30 seconds. Tip the bowl to one side. The jam should move only slightly. If mixture is too fluid and runs to the side of the bowl, return the skillet to heat and continue to cook until mixture looks thicker, 2 to 4 minutes. Repeat the test and continue to cook, if necessary.

Cool to room temperature before serving, about 1 hour.